
 Injectors
 Turbos
 Fuel Pumps
 Oil Pumps
 Electronic Actuators
 EGR Coolers
 Accessory Kits
 Contamination Kits












































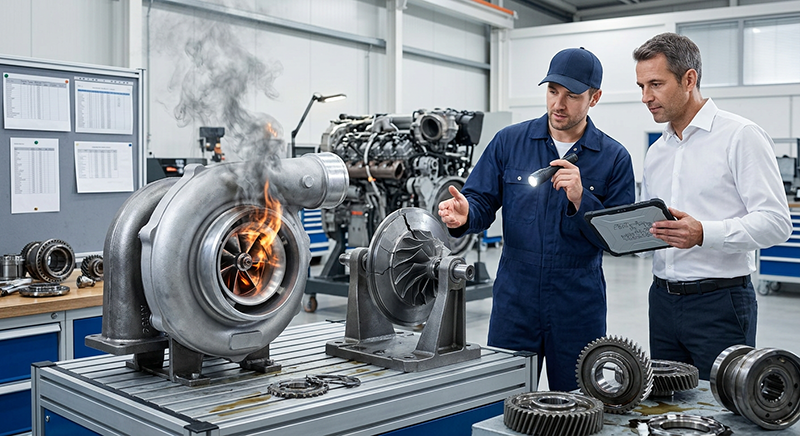
Turbo Failure Analysis That Finds the Real Cause Leave a comment
A failed turbocharger is rarely just a failed turbocharger. Proper turbo failure analysis identifies what damaged the unit before a replacement is installed. Skip that step, and the new turbo can suffer the same failure within minutes, miles, or the next hard pull. For fleet trucks, work pickups, agricultural equipment, and commercial diesels, that means repeat labor, downtime, and a repair bill that keeps growing.
The turbo is exposed to engine oil, intake air, exhaust heat, boost pressure, and electronic control commands at the same time. A fault in any one of those systems can look like a turbo problem. The best repair starts with evidence, not assumptions.
Turbo Failure Analysis Starts Before Removal
Before removing the turbo, document the complaint. Is the truck low on power only under load? Is it producing blue smoke, black smoke, a high-pitched whine, or an intermittent underboost code? Did the issue begin after an oil change, engine repair, intake service, fuel system work, or an emissions repair?
Scan for active and stored fault codes, then compare commanded and actual boost pressure where the platform allows it. On variable geometry turbochargers, check actuator position and vane command data as well. An underboost code does not automatically condemn the turbo. A cracked charge-air pipe, leaking boot, stuck VGT mechanism, restricted exhaust, or faulty sensor can all produce similar symptoms.
Inspect the complete air path before pulling parts apart. Look for loose clamps, oil-soaked boots, split hoses, damaged charge-air coolers, collapsed intake ducting, and air filter restrictions. Pressure-test the charge-air system when possible. A small leak can become a major power loss under load, while a large leak can make a healthy turbo appear weak.
Read the Turbocharger Like a Failed Component
Once the turbo is removed, its condition can point directly toward the root cause. Keep the turbo, oil feed line, drain line, and related hardware organized until the inspection is complete. Throwing away the evidence too soon makes a proper diagnosis harder.
Foreign Object Damage
Bent, chipped, or missing compressor wheel blades usually point to debris entering through the intake side. Inspect the air filter, air box, intake plumbing, compressor inlet, and every clamp or fastener upstream of the wheel. A failed filter element, broken intake duct, loose shop rag, or fragments from a damaged hose can destroy a compressor wheel quickly.
Damage on the turbine wheel indicates debris from the exhaust side. Check for broken valve components, exhaust manifold material, hardware, pieces of a failed emissions component, or engine damage upstream of the turbo. Do not install a replacement until the source is found and removed. Any remaining debris can damage the new wheel immediately.
Oil Starvation and Contaminated Oil
A turbocharger depends on a clean, pressurized oil supply. Bluing or discoloration around the shaft area, damaged bearings, scoring, coked oil deposits, and a seized center section often indicate lubrication trouble. Causes include a restricted oil feed line, debris in the feed circuit, low oil pressure, incorrect oil viscosity, extended oil intervals, or contamination after an engine failure.
Never assume that oil reaching the feed line means the turbo had adequate lubrication. Carbon buildup can restrict a feed line internally. Sealant used during prior repairs can break loose and contaminate an oil passage. On engines with recent injector, fuel pump, camshaft, or bearing failures, inspect for metal and debris throughout the lubrication system.
Replace questionable oil feed lines rather than trying to save a few dollars on a part that can ruin a turbocharger. Change the oil and filter, correct the underlying pressure issue, and verify clean oil flow before the replacement unit is started.
Oil Drain Problems and Crankcase Pressure
Oil found in the compressor outlet, charge-air cooler, or turbine outlet does not always mean the turbo seals failed first. Turbocharger seals rely on correct pressure conditions. If oil cannot drain freely from the center housing, it can back up and pass into the intake or exhaust.
Inspect the drain tube for carbon buildup, kinks, crushed sections, poor routing, and gasket material blocking the drain opening. The drain must route continuously downhill to the engine without restrictions. Also inspect the crankcase ventilation system. Excessive blow-by or a restricted breather raises crankcase pressure and prevents normal oil drainage from the turbo.
This is especially critical on high-mileage diesel engines. Installing a new turbo without correcting excessive crankcase pressure can result in oil consumption, smoke, runaway risk, and another damaged unit.
Overspeed and Excessive Heat
A turbocharger can overspeed when it is forced to work beyond its design range. Common causes include boost leaks, restricted intake airflow, exhaust leaks that affect drive pressure, faulty VGT control, incorrect calibration, or modifications that do not match the engine’s air and fuel requirements.
Overspeed damage may appear as a fractured shaft, damaged wheel tips, or contact between the wheels and housings. Excessive exhaust gas temperature can damage turbine components, crack housings, and create heat-related bearing failure. Fueling problems matter here. Overfueling injectors, incorrect tuning, restricted airflow, or a malfunctioning EGR or aftertreatment system can push exhaust temperatures beyond what the turbo was built to handle.
The answer depends on the engine platform. A modern electronically controlled Cummins, Power Stroke, Duramax, Detroit, or Paccar application may need scan-tool data and actuator testing. Older mechanical diesel applications may require more manual checks of fueling, wastegate operation, and exhaust restriction.
Do Not Diagnose a Turbo by Wheel Play Alone
A small amount of side-to-side movement on an oil-film bearing turbo can be normal before oil pressure is present. The shaft rides on a pressurized oil film during operation, so dry inspection can be misleading. What is not normal is wheel-to-housing contact, excessive end play, grinding, obvious looseness, or damaged blades.
Likewise, oil residue in charge-air plumbing needs context. A light oil film can be normal on some diesel engines. Pooled oil, heavy smoke, rapidly rising oil consumption, or oil pouring from the compressor outlet requires further investigation. Check crankcase pressure, drain routing, and compressor-side operating conditions before assigning blame to the turbo seals.
Inspect the Systems That Can Kill the Replacement
A replacement turbo should not go on until the surrounding system is clean and proven. At minimum, inspect the intake tract, charge-air cooler, exhaust system, oil supply and return, crankcase ventilation, and all control components. On VGT applications, inspect the electronic actuator and related wiring, or confirm the actuator is correctly installed and calibrated for the specific unit.
The charge-air cooler deserves special attention after a major compressor-side failure. Metal fragments and oil can collect inside it and later enter the engine. Depending on the type and level of contamination, the cooler may need thorough cleaning or replacement. Do not take chances if debris cannot be removed with confidence.
If the engine experienced a catastrophic turbo failure with significant oil ingestion, inspect for secondary damage. Bent connecting rods, damaged pistons, contaminated exhaust components, and aftertreatment damage are all possible. An engine that has run on turbo oil can accelerate unexpectedly and may have damage that is not visible from the outside.
Installation Practices That Protect the New Turbo
Use the correct turbocharger for the engine serial number, emissions configuration, and calibration. Similar-looking units may use different housings, actuator settings, compressor wheels, or mounting arrangements. Matching by appearance is not enough.
Install new gaskets, clean all mating surfaces, and ensure nothing enters the turbine or compressor housings during assembly. Prime the turbo with clean engine oil through the oil inlet when the manufacturer procedure calls for it. Verify that the oil feed line is clean and unrestricted, and make certain the drain line is correctly positioned.
Before starting the engine, disable fuel or ignition as appropriate for the platform and crank the engine long enough to establish oil pressure. Then start the engine and check immediately for oil, exhaust, intake, and boost leaks. Let the engine idle briefly before applying load. A hard pull immediately after installation is not a substitute for a controlled leak and pressure check.
For technicians and owners who need a dependable replacement, American Diesel Parts supplies tested turbocharger options for major diesel applications, along with the practical support needed to match the right unit to the job.
A turbo failure is a repair opportunity to fix the whole cause, not just the damaged component. Inspect the evidence, correct the system fault, protect the oil supply, and the replacement turbo has a real chance to deliver the service life your truck needs.
